I have loved dolls, history, and the Victorian Era since I was little and can credit my grandmother for that. As a young girl she gave me a Godey’s Fashion print for August 1870 from my great, great Aunt Flossie. I was captivated by the dresses and became hooked. I just love to research everything and anything about the Victorian Era. I also love to design Victorian dolls. I hope you enjoy my Victorian Dolls, Victorian Traditions,The Victorian Era, and Me blog.

Wednesday, March 19, 2014

Peter With The Big Eyes Loves His Fall Outfit - New Handmade Colonial Doll and E-Pattern


"Pamela With The Big Eyes Loves Her Fall Colors" and her brother, "Peter With The Big Eyes Loves His Fall Outfit",  are unusually close.  They're fraternal twins, born two minutes apart on October 12 - Columbus Day. As a result they love the Fall and it's bright, beautiful colors, and they love being Colonial. Born and bred in Salem, MA.

So, it is no surprise that they love to wear their best Fall outfits when out for a walk on a beautiful Fall day. They love to walk down near the pier and the harbor. It's just so beautiful and peaceful down there. Plus, when they get hungry they can have afternoon tea and one of their favorite scones at a local cafe.

Pamela is a quiet, shy but  proper, colonial girl. She was taught how to be a gracious lady and believes in being proper,  friendly and courteous at all times - especially when out in public. Her only problem is that everyone keeps looking at her and her big, beautiful eyes - especially the young "gentlemen.". With all the eyes on her she gets self-conscious and starts to blush.  And, when that happens she blushes from head to toe. Then all the young gentleman can't help themselves and vie for her attention - which irks her brother, Peter, to no end.

Pamela With The Big Eyes Loves Her Fall Colors - New Handmade Colonial Doll and E-Pattern


"Pamela With The Big Eyes Loves Her Fall Colors" and her brother, "Peter With The Big Eyes Loves His Fall Outfit",  are unusually close.  They're fraternal twins, born two minutes apart on October 12 - Columbus Day. As a result they love the Fall and it's bright, beautiful colors, and they love being Colonial. Born and bred in Salem, MA.

So, it is no surprise that they love to wear their best Fall outfits when out for a walk on a beautiful Fall day. They love to walk down near the pier and the harbor. It's just so beautiful and peaceful down there. Plus, when they get hungry they can have afternoon tea and one of their favorite scones at a local cafe.

Sunday, March 9, 2014

My Celia's Art Doll


Celia has been a member of The Red Hat Society for a long time and thoroughly enjoys the times they get together. She and the other ladies of the club love dressing up in their purple dresses and red hats, and letting their hair down. Sometimes things get a little wild, but that doesn't deter any of the ladies. They love their lives, they love each other, and best of all they love happy fun - especially when it's the dress-up kind.

"Celia - Art Doll" is a 19" art doll with a cloth body, embroidered face with wire glasses, fully wired and bendable cloth body, and thick white curly hair. She is wearing red print bloomers gathered at the waist and ankles. Her black felt boots are criss-crossed with DMC embroidery floss for laces.

Tuesday, August 27, 2013

My Victorian Faceless Ladies Art Dolls

My love affair with the Victorian Era started a long time ago. In fact, sometimes I think I was born in the wrong era. My Victorian "Lady" dolls are all faceless because I wanted each to have its' own distinct personality. My feeling is that faces overwhelm the dolls personality and have a greater impact on her personality. I wanted the clothing, clothes, hair, color scheme, etc. of the period to determine the personality of the doll. I hope you enjoy my Victorian "ladies."

My Victorian Faceless Ladies Dolls


Designer - Linda Walsh of Linda Walsh Originals

For more information on my Victorian Faceless Lady Dolls print patterns and e-patterns please CLICK HERE.


Designer - Linda Walsh of Linda Walsh Originals

For more information on the Victorian Faceless Lady Handmade Dolls that I have for sale please CLICK HERE.

Tuesday, June 25, 2013

My Victorian Paper-Clay Bird Dolls


I should have known better than to ever let the "dollies" mingle with the trio of "birdies" I was making for my Artful Gathering "Briley The Birdie" class with Colleen Moody. The "dollies" convinced the "birdies" they should be different than "Briley."

So, despite my best efforts to get them to conform my trio of "birdies" decided to be rebellious and be the class radicals. They decided they didn't want to be cream colored. They  wanted to be sponge painted. They insisted on it and then they had all the "dollies" urge me to sponge paint them.

There were just too many "dollies" clamoring for this that I had to acquiesce. Now I know you all know I hate to give in to the "dollies" demands but with the trio of "birdies" and all the "dollies" clamoring I was sorely outnumbered.


I thought if I gave in to the trio of "birdies" on this they'd calm down and let me create them the way I wanted to. Au contraire!  Each one had already developed a personality of their own and therefore a style they thought was best for them. Who was I to argue? I was just their creator. So, once again, I acquiesced.


One thought she was a Queen and wanted to be treated like one. I named her Queen Annabell but I refused to bow and curtsy to her.


Another decided she wanted to be Bohemian. I named her Natasha.


And, the third decided she wanted to be Funky. I named her Phebe.


Right now when I look at them all together they look like little "biddies" conspiring to me.  Of course, I see bogey men everyone when it comes to my "dollies" and their demands.  And, since the "birdies" have developed such a close relationship with the rest of the "dollies" who knows what they'll be demanding next.


I'll just have to wait and see.  For sure, I'm not going to wait on them.  I might serve them afternoon tea, but that's it.


Perhaps I'll be surprised and they'll be delightful.  Perhaps they'll be nice, well-mannered, and a delight to be around.  Perhaps their charm will rub off on the rest of the "dollies."  Perhaps.......


Friday, February 8, 2013

My Queen Anne House Cross-Stitch Picture


When trying to decide on which small cross-stitch kits I wanted to try last year I knew I wanted to cover several holidays and seasons. To cover the Christmas holiday season and the winter season I choose the counted cross-stitch and bead design from Mill Hill - -Buttons &  Beads Series #MH14-7301 Queen Anne House. I, of course, just love Victorian Houses so this was a simple choice for me!

Like the other Mill Hill  - Buttons & Beads Series patterns I had bought the Queen Anne House kit included the pattern, embroidery thread, perforated paper, beads, 2 needles and instructions.

The Queen Anne House pattern uses full counted cross-stitch and outline stitching as well as beads for emphasis and depth. The pattern also calls for certain areas of the perforated paper to be left untouched as the background.

Given the experience I had with my "Spirit of Quilting Angel Counted Cross Stitch Project" and the fragile nature of perforated paper I decided to add wide masking tape to the back of my perforated paper before I started cross-stitching. I also decided to utilize the rectangular wood frame jig that my darling husband built for me that I could tape the edges of my perforated paper to. The wood frame jig was a rectangular embroidery hoop of sorts, but without bending the paper. He made it out of 1/2" x 1" pine wood strips. It also had an adjustable center strip that I used for this 5 x 5 square design.

I also decided this time that I needed to draw diagonal lines to locate the exact center of the perforated paper as in the Gather Together  cross-stitch picture I was slightly off center by a few holes which caused a problem with inserting the needles in the holes along one of the edges of my frame. So, I drew a diagonal line across each corner to get the center point of the perforated paper.

I had also run into a slight problem with the beads along the edge of the Gather Together  cross-stitch picture I had done when framing it so this time I also drew squares on the perforated paper to show me where the 5" x 5" square was and where a 4 1/2" x 4 1/2" square would be. The reason for the latter was because one of the frames I was considering for this while 5" x 5" only displayed 4 1/2" x 4 1/2" in the glass window. So, I wanted to make sure that I was okay as far as the design and beads were concerned along the edges were I to use this frame. Ten to one I was going to use the shadowbox frame like I had done for my Gather Together  cross-stitch picture so this wouldn't be a problem. But, just in case I didn't I wanted to be prepared.

While the end results of this design were wonderful some things in the kit and in the instructions could be improved upon. I'd like to offer the following constructive suggestions:

The cross-stitch chart was in black and white as was the floss color code and symbol key. Both were easy to read and very clear. While I had no problem with the chart and keys I did have a problem with the way the DMC floss was presented. All of the floss was tied together in one big knot so you had to separate the floss pieces yourself, sort them, and try to interpret which color belonged to which floss # and symbol key on the color chart.  If you only have a few colors to deal with this isn't a problem. However, if you have several different colors of say green to choose from that are close in color then interpreting the chart can be tricky. You may assign the wrong color to the wrong symbol if the colors are too closely aligned.

As I have done with other cross-stitch kits I've completed I had to design my own thread color sorter and symbol key. I took a piece of thin cardboard and cut a 1" x 9" long rectangular piece out to use as a thread sorter. I then punched 20 holes in my cardboard strip in which to tie each of the different colors. Just above the hole I wrote the DMC floss # and just below the hole I added the respective cross-stitch symbol. I then inserted the floss threads that went with that # and symbol through the hole and tied them in a loose knot. This kit could be much improved if a thread sorter with respective #'s and symbols was provided.

The beads were contained within two small ziploc bags which was fine. However, several different color beads were contained within each bag without any indication as to what bead numbers were included within the respective bag. If you only had one color bead to choose from in a bag this wouldn't have been a problem. However if there were multiple green beads within one bag or one bag contained green beads and the other bag contained green beads then you were left to interpret which color green bead the color chart was referring to. Labeling the ziploc bags as to which bead number they contained would enhance this kit.

I love using beads in cross-stitch designs as I think they really enhance the designs, as was the case with this kit. However, I had a tough time trying to thread the really tiny needle that came in this kit for beading purposes. I know the head of the needle has to fit through the tiny bead openings, but these needles were really, really difficult to thread and trying to do so was not only frustrating, but time consuming.

The pattern called for certain areas of the perforated paper to be left untouched as the background like the picture shown below:

Sunday, December 2, 2012

My Victorian Fashions Pinterest Board and My Historic Periods Fashion Pinterest Board

One of the things I absolutely love about my Linda Walsh Pinterest boards is I can collect all the Victorian and Historic Periods fashions I love in one neatly organized place.

Well, now Pinterest has a wonderful widget that allows me to add a snippet of my two boards within a blog post or on the sidebar of my blog so I can easily share some of my boards with all of you here.


If you'd like to see more of my Victorian Fashions Pinterest board just click on the board above or CLICK HERE.


If you'd like to see more of my Historic Periods Fashions Pinterest board just click on the board above or CLICK HERE.

I added the Pinterest widget to the sidebar of my my Victorian Dolls, Victorian Traditions, The Victorian Era and Me Blog. so you can visit my Victorian and Historic Periods Fashions boards whenever you visit my Victorian Dolls, Victorian Traditions, The Victorian Era and Me Blog.


Tuesday, June 26, 2012

What A Surprise! My Crazy Quilt Purse Is Definitely VERY Victorian!


What is it they say?  "A little rain never hurt anyone!"  Well, that's true as far as I'm concerned as a little rain today allowed me extra time to finish my crazy quilt purse.

If you've been following along with the posts on my Linda's Blog you know that I've been taking my very first online class with Pat Winter on Artful Gathering. The class is called Crazy Quilting 101 and I have LOVED every minute of the class. Pat is such a fantastic teacher. I only wish I had taken one of her classes years ago.

My head is filled with all sorts of ideas for crazy quilting creations that I can make and, maybe, give as Xmas presents this year. Who knows! My head is spinning.

What I do know is that I LOVE crazy quilting and may have found a new passion.  And, that passion is very much up my Victorian passions alley.

Does that mean I'm giving up of dolls, Victorian fashions, silk florals, history and everything else I LOVE. Of course not! It just means I'm going to find a way to combine everything I love. That means I may be creating crazy quilting things related to Victorian dolls or florals.  Maybe a little genealogy? You never know.


I ended up lining and finishing with some addition iron-on interfacing added to the lining material as well.  So, both the lining pieces and the front and back pieces ended up with iron-on interfacing on them.  The front actually ended up with two iron-on interface pieces.

I'm also thinking that I'm going to sew two large snaps to the inside top of my purse to hold the top closed. That way no one can just reach in and steal my belongings. Not that I'd put anything in it worthy of stealing! Well, chapstick maybe!

I'm really pleased with the way my purse came out. Definitely looks Victorian which is certainly right up my alley. I may just have to keep my beautiful blue purse. I'm such a bad sister!


Saturday, May 5, 2012

Historical Fashion Periods Timeline

Yesterday I posted an article entitled "A Wonderful Moseying At The MET!" concerning my preliminary research on the historical fashion periods and what I had learned.  Since I tend to like everything nice and neat and totally organized I decided the best way for me to try and understand the different fashion periods was to create a time line that I could update, change, and add to from time to time.

So, I created the following timeline that I've added to the sidebar of my Victorian Dolls, Victorian Traditions, The Victorian Era and Me Blog .  This timeline is really for me to help me understand what periods the fashions I like might fall into when I see different styles.  I am far from and will never claim to be any kind of an expert on historical fashion periods.  My timeline is being included in my sidebar as a personal reference tool for me. Something I can learn from, something I can update, something changeable if incorrect, and something I can update from time to time.

HISTORICAL FASHION PERIODS

  • 0476 A.D. - 1150 Dark Ages
  • 1150 - 1485 Medieval, Gothic, Middle Ages
  • 1485 - 1550 Renaissance
  • 1558 - 1603 Elizabethean/Jacobean
  • 1620 - 1660 Cavalier (Early Baroque)
  • 1660 - 1715 Baroque Restoration - The Golden Age - Louis XIV
  • 1715 - 1775 Rococo
  • 1769 - 1821 Napoleonic Wars
  • 1775 - 1795 NeoClassical
  • 1790 - 1795 Revolution
  • 1795 - 1815 Directorie/Empire
  • 1800 - 1803 Classical Greek Dress
  • 1800 - 1820 Regency Fashion
  • 1800 - 1837 Georgian Era
  • 1804 - 1807 Etruscan and Egyptian Ornament
  • 1815 - 1848 Romantic
  • 1837 - 1860 Early Victorian - Charles Worth Era
  • 1837 - 1901 Victorian Era
  • 1848 - 1870 Victorian Crinoline
  • 1860 - 1882 Victorian First Bustle Era
  • 1870 - 1890 Victorian Bustle
  • 1870 to 1914 Fun De Siecle, Art Nouveau Movement
  • 1883 - 1901 Late Victorian - Second Bustle Era, Gibson Girls, Naughty Nineties
  • 1890 - 1913 Edwardian
  • 1895 - 1914 La Belle Epogue, Lost Golden Age
  • 1914 - 1918 WWI
  • 1920 - 1930 Art Deco and Roaring Twenties
  • 1930 - 1940 Golden Age of Hollywood - Rise of Chanel, Stylish Thirties
  • 1930 - 1950 Hollywood Glamour Girls
  • 1939 - 1945 WWII
  • 1940 - 1960 Dior Revolution. The New Look Era, Hourglass Silhouette
  • 1945 - 2000 Ready To Wear Fashion or Pret-a-Porter
  • 1950 - 1960 Rock N Roll Era
  • 1960 - 1975 Hippies, Flower Power, Baby Boom Generation, Op Art
  • 1975 - 1980 Mini skirts, Twiggy, Disco Fever
  • 1980 - 1990 New Romantics, Power Dressing, Yuppies,
  • 1985 - 2000 Grunge, Deconstructionism, Minimalism, Purism, Bo Ho Hippy

Wednesday, June 8, 2011

Another Victorian Cross-Stitch Picture And It's Absolutely Wonderful!


I don't know if you remember or not, but last December I wrote a blog post entitled  "You Spent How Many Hours On That Cross-Stitch?" that talked about my spending over 250 hours on a cross-stitch picture. Back then you may have thought that 250 hours is a long time to spend on one project. Well, if I told you that I just spent 315 hours on another cross-stitch picture you might think I really have lost my mind.

I started this Dimensions Needlecrafts Counted Cross Stitch, In Her Gardenon December 29, 2010 and finally finished it on May 14, 2011. Hubby painstakingly documented my progress day by day so we'd have a detailed breakdown. I worked on this a few hours every day - every chance I got. I quickly learned that there were a lot of color changes due to all the flowers and, as a result, this was going to take a lot of time. And, for sure, it did.

So, was the 315 hours worth it? Absolutely! I'd do it again as the cross-stitch picture framed (shown in the picture above) is absolutely stunning.

To give you a little background on why I would create yet another massive cross-stitch picture I have to take you back to the rationale for my previous cross-stitch picture.  In July, 2010 I wrote a Linda's Blog post about my pressed flower pictures entitled "My Pressed Flower Pictures - Now That's A Great Idea!" In that post I told you about a large pressed flower picture I had made that was hanging in our master bedroom and, sadly, was fading which meant it needed to be replaced.

Well, my husband thought a needlepoint picture like the one I had done in the dining room but much bigger would be nice. I wrote about this needlepoint picture awhile ago in a Linda's Blog post entitled "Needlecraft Picture From A Decade Ago - Or So!"

So, since our house is filled with dolls and pictures of buildings & houses I thought a cross-stitch Victorian scene might be just the thing. So, I set out to find some large cross-stitch kits that would be suitable.

Sunday, April 24, 2011

A Day For Lilies

Easter - the end of the winter and the beginning of spring. What a wonderful time of the year. When I think of Easter I think of Easter outfits, Easter baskets, church services,  and Easter lilies.

My favorite, of course, is Victorian Easter dresses. Second to that is the Easter lily. I can remember coming home each Easter from church with an Easter Lily. I loved them then and I love them now. In fact, I have a garden filled with them along with tiger lilies, daffodils, tulips and day lilies.

The reason my garden is filled with them is because each and every Easter for the last 30 years or so my Mother would bring one to me. After the blooms were gone I'd plant it in my garden. That way, every year I got to marvel at the sheer beauty and delicacy of its blooms. They are magnificent.

The lily is a symbol of purity because of its whiteness and very delicate form. It symbolizes innocence. It's called the Easter lily because the flowers bloom in early Spring, around Easter. The white lily, or Bermuda trumpet, was brought to the United States from Bermuda in 1880 by Mrs. Thomas P. Sargent of Philadelphia, Pa. It has become the mainstay of Easter floral arrangements and church decorations.

This will be the second year without an Easter lily from Mom.  While we won't have a lily to look at we will have many, many wonderful memories of beautiful Easter Sunday's with Mom.  Sitting in our sun-room or outside in the gardens we will always have treasured memories of times filled with love, laughter, and beautiful lilies.

If you have an Easter lily or have been given one make sure that you plant it in your garden. That way you'll see it bloom time and time again. So, each year you can't help but marvel at its magnificence.

We hope everyone has a very Happy Easter.

Graphics - Courtesy of The Graphics Fairy at http://graphicsfairy.blogspot.com/

Saturday, March 19, 2011

Don't Ask Hilda To Gossip! She's Too Much Of A Lady For That! - Victorian Lady Doll


Hilda is a very friendly lady and just loves to visit the neighbors, especially those who are new in town.  She's a one woman welcoming committee and just loves to tell her neighbors all about her town and all the activities that are going on.  It's a small town so Hilda is well informed as to all the activities.

Hilda is an 11" free standing cloth and wood doll.   Her arms are wire-shaped and covered. She also has a painted wood head and covered round wood base. Her inner body is made from a dowel covered with fabric and eyelet lace.  Her lace trimmed slip is gathered at the waist.

She has a ruffled at the shoulder dress with long ruffled and gathered sleeves and ruffled bottom. Her shawl is  fringed and a silver heart serves as a clasp.  She has long black hair wrapped in a braid framing her face, and is carrying a food basket.

Hilda just loves to tell her new neighbors all that's going on. However, don't ask her for any gossip. Hilda is too much of a Victorian lady to engage in gossip.

Designer - Linda Walsh of Linda Walsh Originals

Friday, March 18, 2011

Helen Louise Is Ready For Her Graduation Day! - Victorian Lady Doll


Helen Louise has been anxiously awaiting her college graduation.  Much more so than when she graduated from high school.

You see, she is the first person in her family to graduate from college.  She worked very hard during her high school years and graduated as valedictorian of her class with a 4.0 GPA.  She wanted to get into Harvard , to study law, and become a lawyer.  She even had dreams of one day serving on the Supreme Court.

Right now she is just thrilled she is graduating and that her whole family will be at the graduation ceremony, including her grandmother.  So, she's wearing an outfit that she knows her grandmother would love.

Helen Louise  is a free-standing cloth and wood doll.  Her arms are wire-shaped and covered. She also has a painted wood head and covered round wood base. Her inner body is made from a dowel covered with fabric and eyelet lace.  Her slip is lace trimmed and gathered at the waist.

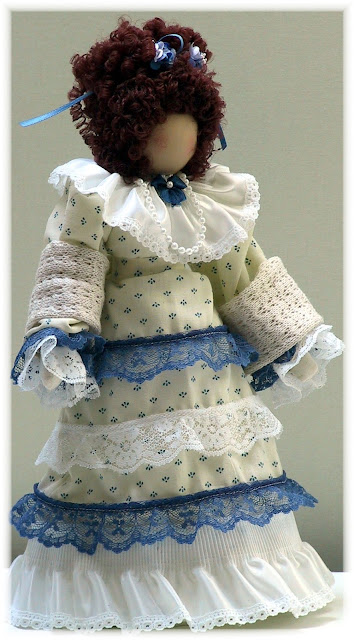
She has a fancy multi-tiered 2 color lace trimmed dress with long lace trimmed and gathered sleeve and a ruffled and laced collar.    She has a lace shawl wrapped around her shoulders and a  pearl necklace around her neck.  Her beautiful brown curly hair is tied in a ponytail at the top of her head with floral accents.

Helen is especially proud that her grandmother will be attending her college graduation. She hopes she will be attending her law school graduation and will be the first person she calls when she passes the bar.

Her grandmother always wanted to attend college, but that was not in the cards for her. However, it was for Helen Louise and her grandmother could not be prouder of her.

Designer - Linda Walsh of Linda Walsh Originals

Sunday, February 13, 2011

Our Adorable Little Guy - Elmer - Victorian Boy Doll


One of my most popular e-patterns continues to be "Elmer's Little Boy." It's not difficult to see why that is. He's just so cute you just want to squeeze him. As a result, he gets squeezed a lot.

Elmer's Little Boy" is so cute you just want to squeeze him. With a big pot belly and big ears he has loads of charm. Worse - he knows it and uses it to his every advantage. He can charm them young, he can charm them old, male or female. It doesn't matter. They all succumb to his charm and that impish gleam in his eyes.

Nellie - My Victorian Snow-lady Doll

Two things today got me to thinking about "Nellie" my Victorian snowlady doll pattern. The first is that it is once again snowing outside. This is the fourth time this week. I'm beginning to think that Mother Nature is out to get us or, at the very least, inundate us with snow.
The second is a comment from my husband. When the Christmas decorations are put away the Winter decorations, also known as snowpeople, make their appearance. In the front foyer of our house I have a seasonal display. Right now there is a large floral basket with all the winter blue colors and three of my snowpeople dolls there. The focal point of the winter display is my "Nellie" Victorian snowlady doll.
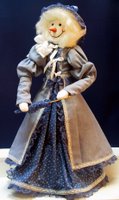
"Nellie" was named after my husband's GrandAunt who was born in May of 1889, definitely during the Victorian Era. Or, at the very least, towards the end of the Victorian Era. All I could think of while I was designing her was that "Nellie" had to have been a bit on the shy, defined, and eloquent side. So, my "Nellie" had to be also.

Yah, so? Linda, will you please get to the second reason!!! Okay, okay. You know how I love to get off track. In any event, my husband told me yesterday that he thinks that my "Nellie" Victorian snowlady doll is the best doll I've ever made. Well, I couldn't agree with him more. She really is quite stunning. I have to keep that to myself though as "Nellie" is quite full of herself as are most of the dolls I've made. She just loves to be on display and begged me to show you the new pictures that I've just taken of her so you could judge for yourselves.

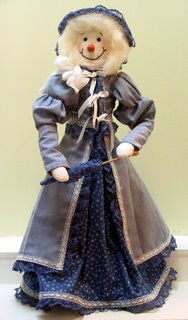
"Nellie" is a free-standing 23" tall and is wearing an 1893 Victorian Ladies Street Costume. She has a fancy double-tiered lace trimmed dress, full length double-tiered laced trimmed (inside and out) lined jacket with long puffed sleeves, fancy lace and floral decorated lined hat, lace trimmed and gathered slip, lace trimmed and gathered bloomers, lace trimmed parasol, and lace gloves. Her arms are wire-shaped and covered. Her hair is white with bangs and is fastened in a bun. Her face is partly embroidered and she has a covered Styrofoam head and cloth body supported by a wood dowel and covered wood base. Her fancy hat is tied with a lace ribbon into a bow on the side of her head.

"Nellie" is one of my more advanced patterns and requires a more experienced sewer. It's not that she is "difficult" herself (she told me to tell you that) it's just that her clothing is intricately designed. Her lined coat is adorned with lace both inside and out.

So, what do you think? Is she stunning? If you think so, please don't tell her. Make sure you send me a confidential e-mail. "Nellie" is quite the snoop and if she found out there would be no living with her then. She'd want to be on display year round. And then I'd have "Dollie WWIII" going on in my house. Please, please if you think she's gorgeous let ME know. Just don't tell"Nellie."

Designer - Linda Walsh of Linda Walsh Originals